使用 Ray Serve LLM 部署 Deepseek R1#
本指南将分步介绍如何使用 Ray Serve LLM 在 Kubernetes 上部署大型语言模型 (LLM)。本指南利用 KubeRay、Ray Serve 和 vLLM,部署 Hugging Face 上的 deepseek-ai/DeepSeek-R1 模型,从而在 Kubernetes 环境中实现可扩展、高效且与 OpenAI 兼容的 LLM 服务。有关 Ray Serve LLM 的信息,请参阅 Serving LLMs。
先决条件#
DeepSeek 模型需要 2 个节点,每个节点配备 8 个 H100 80 GB GPU。应将其部署在满足此要求的 Kubernetes 集群上。本指南提供了使用 A3 High 或 A3 Mega 机器类型在 GKE 上设置集群的说明。
在创建集群之前,请确保您的项目具有足够的 配额来满足所需的加速器。
步骤 1:在 GKE 上创建 Kubernetes 集群#
在本地机器或 Google Cloud Shell 上运行此命令及所有后续命令。如果从本地机器运行,您需要安装 Google Cloud SDK。以下命令将在 us-east5-a 区域创建一个名为 kuberay-gpu-cluster 的 Kubernetes 集群,其中包含 1 个默认 CPU 节点。此示例使用了 e2-standard-16 机器类型,该类型具有 16 个 vCPU 和 64 GB 内存。
gcloud container clusters create kuberay-gpu-cluster \
    --location=us-east5-a \
    --machine-type=e2-standard-16 \
    --num-nodes=1 \
    --enable-image-streaming
运行以下命令为 Ray GPU 工作节点创建按需 GPU 节点池。
gcloud beta container node-pools create gpu-node-pool \
    --cluster kuberay-gpu-cluster \
    --machine-type a3-highgpu-8g \
    --num-nodes 2 \
    --accelerator "type=nvidia-h100-80gb,count=8" \
    --zone us-east5-a \
    --node-locations us-east5-a \
    --host-maintenance-interval=PERIODIC
--accelerator 标志指定节点池中每个节点的 GPU 类型和数量。此示例使用了 A3 High GPU。机器类型 a3-highgpu-8g 具有 8 个 GPU、640 GB GPU 内存、208 个 vCPU 和 1872 GB RAM。
注意
要创建使用预留的节点池,您可以指定以下参数
--reservation-affinity=specific--reservation=RESERVATION_NAME--placement-policy=PLACEMENT_POLICY_NAME(可选)
运行以下 gcloud 命令配置 kubectl 以便与您的集群通信
gcloud container clusters get-credentials kuberay-gpu-cluster --zone us-east5-a
步骤 2:安装 KubeRay operator#
按照 Deploy a KubeRay operator 中的说明,从 Helm 存储库安装最新的稳定 KubeRay 运算符。示例配置中的 Kubernetes NoSchedule 污点可防止 KubeRay 运算符 Pod 在 GPU 节点上运行。
步骤 3:部署 RayService#
通过运行以下命令,将 DeepSeek-R1 部署为 RayService 自定义资源
kubectl apply -f https://raw.githubusercontent.com/ray-project/kuberay/master/ray-operator/config/samples/ray-service.deepseek.yaml
此步骤设置了一个自定义 Ray Serve 应用程序,用于在两个工作节点上部署 deepseek-ai/DeepSeek-R1 模型。您可以检查并修改 YAML 文件中的 serveConfigV2 部分,以详细了解 Serve 应用程序
serveConfigV2: |
  applications:
  - args:
      llm_configs:
        - model_loading_config:
            model_id: "deepseek"
            model_source: "deepseek-ai/DeepSeek-R1"
          accelerator_type: "H100"
          deployment_config:
            autoscaling_config:
              min_replicas: 1
              max_replicas: 1
          runtime_env:
            env_vars:
              VLLM_USE_V1: "1"
          engine_kwargs:
            tensor_parallel_size: 8
            pipeline_parallel_size: 2
            gpu_memory_utilization: 0.92
            dtype: "auto"
            max_num_seqs: 40
            max_model_len: 16384
            enable_chunked_prefill: true
            enable_prefix_caching: true
    import_path: ray.serve.llm:build_openai_app
    name: llm_app
    route_prefix: "/"
具体来说,此配置从 deepseek-ai/DeepSeek-R1 加载模型,并将其 model_id 设置为 deepseek。 LLMDeployment 使用 engine_kwargs 字段初始化底层 LLM 引擎,其中包含关键性能调优参数
tensor_parallel_size: 8此设置启用了张量并行,将模型的各个大层分散到 8 个 GPU 上。根据集群节点使用的 GPU 数量调整此变量。
pipeline_parallel_size: 2此设置启用了管道并行,将模型的整个层集划分为 2 个顺序阶段。根据集群工作节点数量调整此变量。
deployment_config 部分设置了所需的引擎副本数量。有关更多信息,请参阅 Serving LLMs 和 Ray Serve 配置文档。
等待 RayService 资源变为健康状态。您可以通过运行以下命令确认其状态
kubectl get rayservice deepseek-r1 -o yaml
几分钟后,结果应与以下类似
status:
  activeServiceStatus:
    applicationStatuses:
      llm_app:
        serveDeploymentStatuses:
          LLMDeployment:deepseek:
            status: HEALTHY
          LLMRouter:
            status: HEALTHY
        status: RUNNING
注意
模型下载和部署通常需要 20-30 分钟。在此过程中,请使用 Ray Dashboard(步骤 4)的集群选项卡来监视磁盘填充过程中的下载进度。
步骤 4:查看 Ray Dashboard#
# Forward the service port
kubectl port-forward svc/deepseek-r1-head-svc 8265:8265
转发后,导航到仪表板上的 Serve 选项卡,以查看应用程序状态、部署、路由器、日志和其他相关功能。 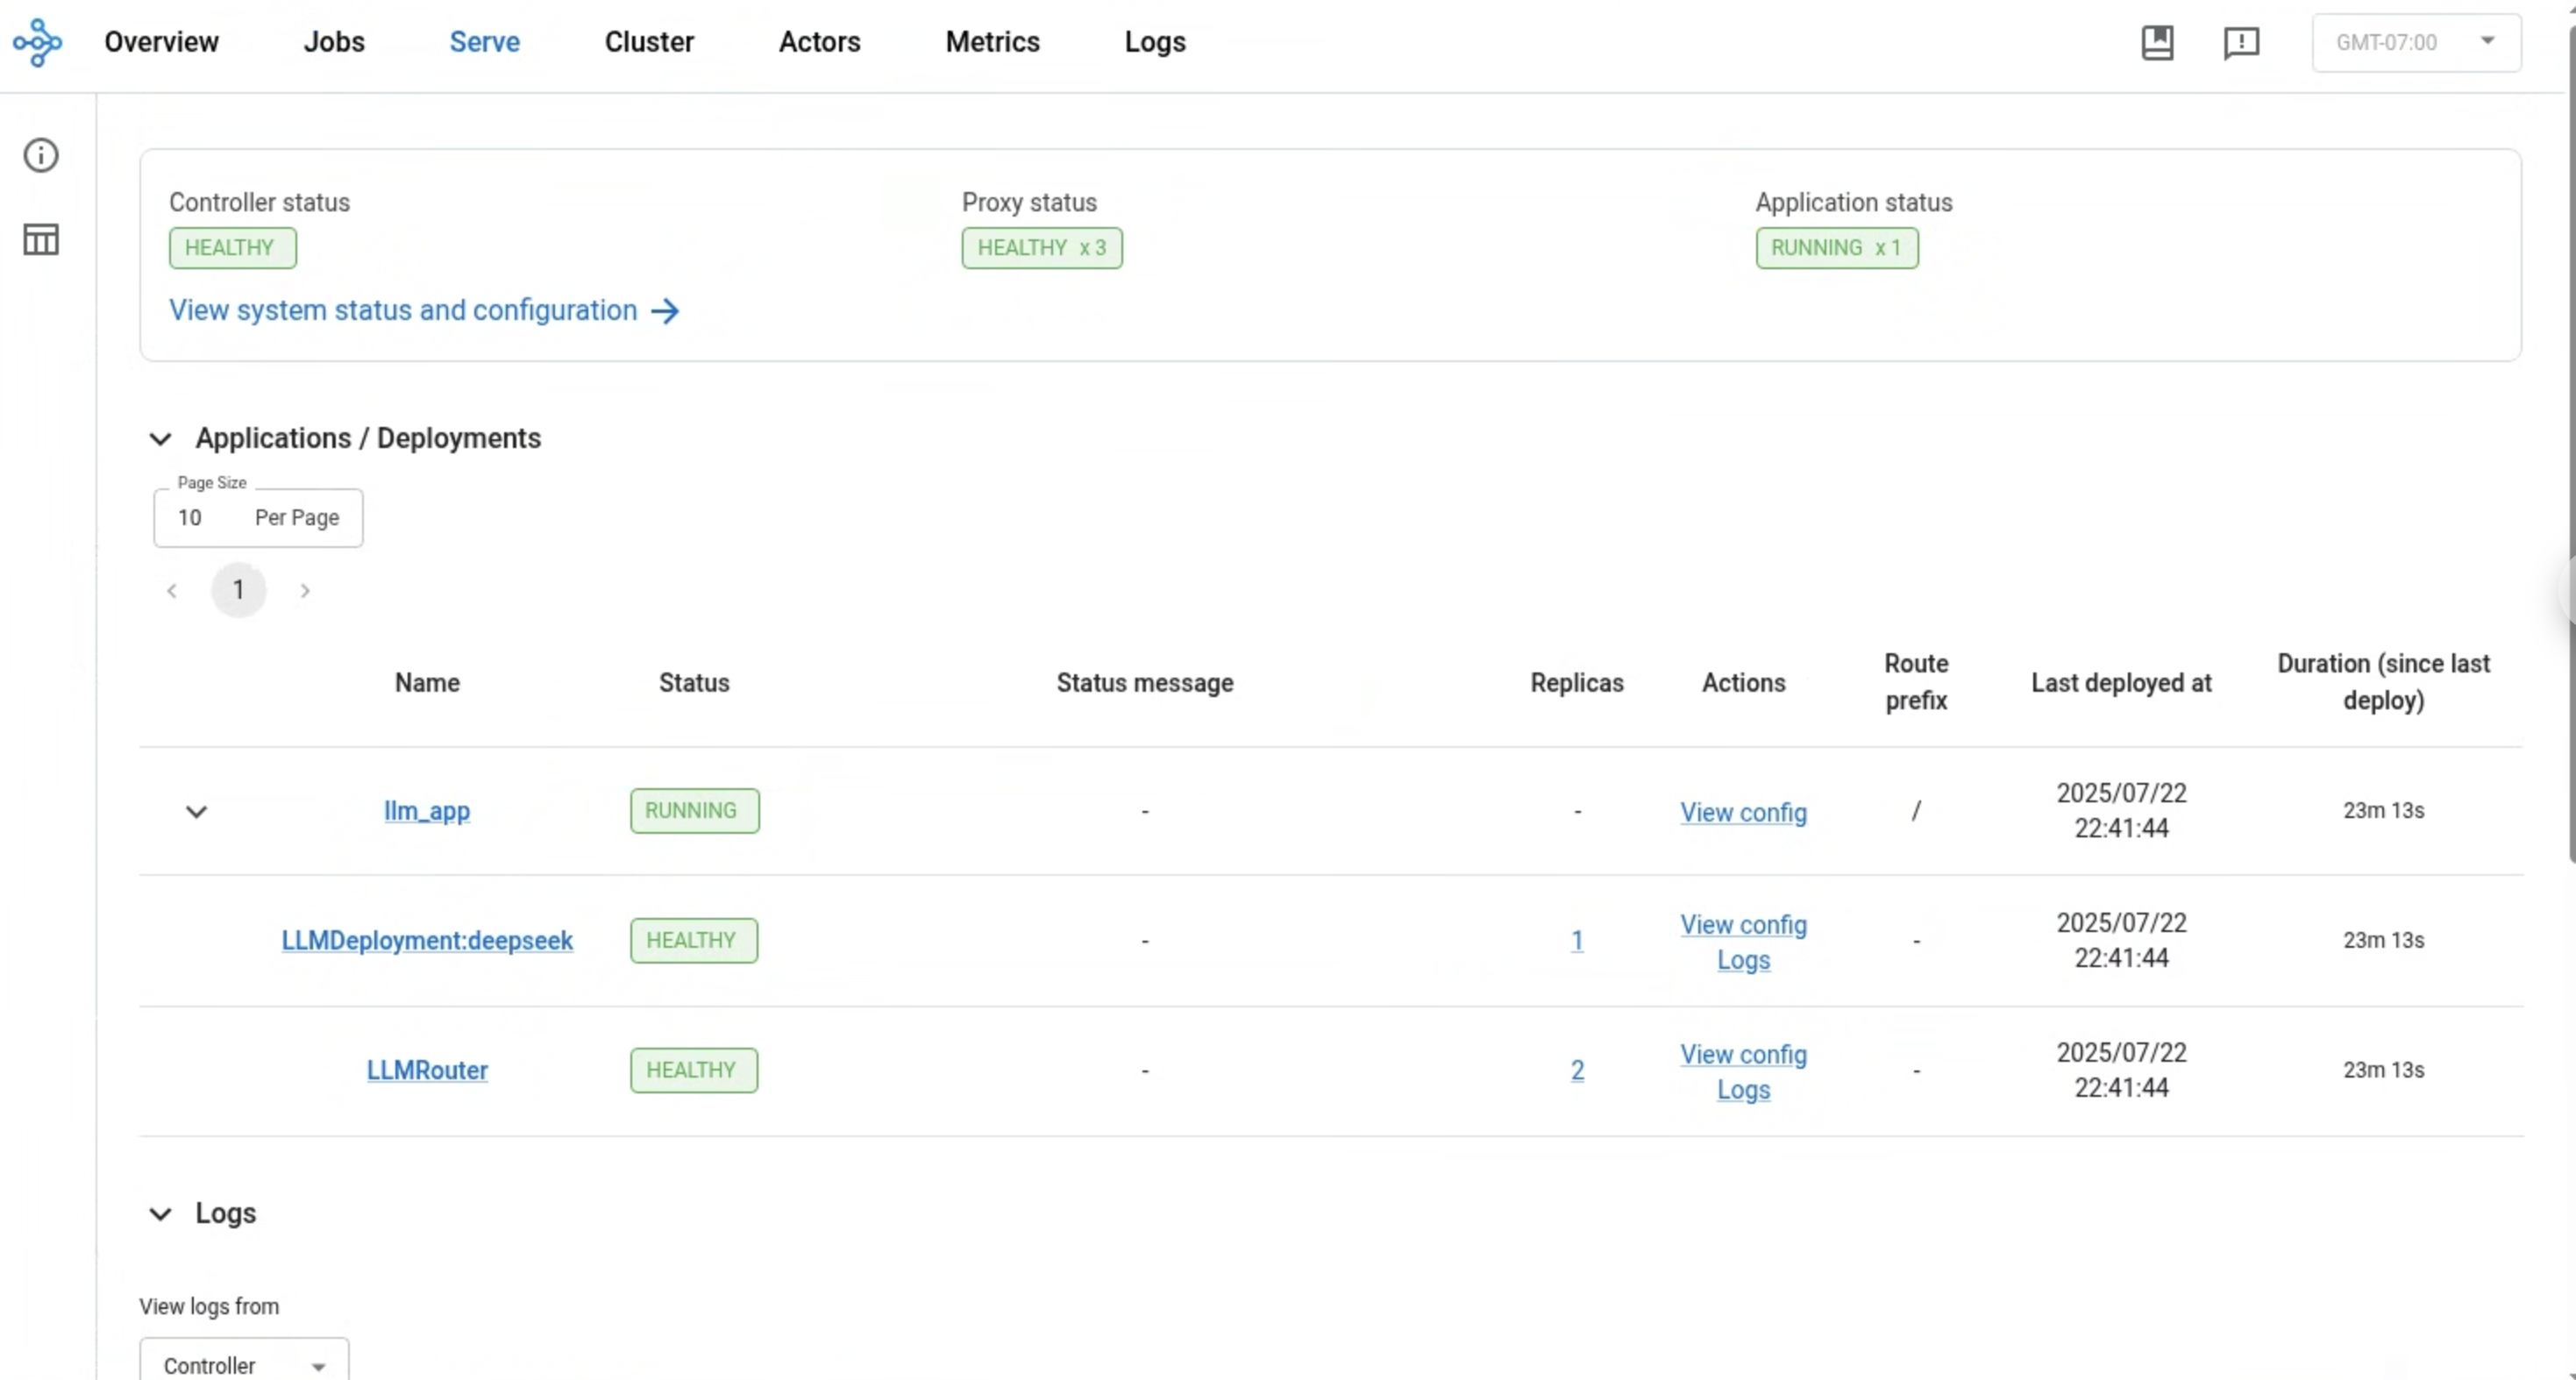
步骤 5:发送请求#
要将请求发送到 Ray Serve 部署,请从 Serve 应用程序服务转发端口 8000
kubectl port-forward svc/deepseek-r1-serve-svc 8000
请注意,此 Kubernetes 服务仅在 Ray Serve 应用程序运行并准备就绪后才会启动。
使用以下命令测试服务
$ curl https://:8000/v1/chat/completions     -H "Content-Type: application/json"     -d '{
      "model": "deepseek",
      "messages": [
        {
          "role": "user",
          "content": "I have four boxes. I put the red box on the bottom and put the blue box on top. Then I put the yellow box on top the blue. Then I take the blue box out and put it on top. And finally I put the green box on the top. Give me the final order of the boxes from bottom to top. Show your reasoning but be brief"}
      ],
      "temperature": 0.7
    }'
输出应采用以下格式
{
  "id": "deepseek-653881a7-18f3-493b-a43f-adc8501f01f8",
  "object": "chat.completion",
  "created": 1753345252,
  "model": "deepseek",
  "choices": [
    {
      "index": 0,
      "message": {
        "role": "assistant",
        "reasoning_content": null,
        "content": "Okay, let's break this down step by step. The user has four boxes: red, blue, yellow, and green. The starting point is putting the red box on the bottom. Then blue is placed on top of red. Next, yellow goes on top of blue. At this point, the order is red (bottom), blue, yellow. \n\nThen the instruction says to take the blue box out and put it on top. Wait, when they take the blue box out from where? The current stack is red, blue, yellow. If we remove blue from between red and yellow, that leaves red and yellow. Then placing blue on top would make the stack red, yellow, blue. But the problem is, when you remove a box from the middle, the boxes above it should fall down, right? So after removing blue, yellow would be on top of red. Then putting blue on top of that stack would make it red, yellow, blue.\n\nThen the final step is putting the green box on top. So the final order would be red (bottom), yellow, blue, green. Let me verify again to make sure I didn't miss anything. Start with red at bottom. Blue on top of red: red, blue. Yellow on top of blue: red, blue, yellow. Remove blue from the middle, so yellow moves down to be on red, then put blue on top: red, yellow, blue. Finally, add green on top: red, yellow, blue, green. Yes, that seems right.\n</think>\n\nThe final order from bottom to top is: red, yellow, blue, green.\n\n1. Start with red at the bottom.  \n2. Add blue on top: red → blue.  \n3. Add yellow on top: red → blue → yellow.  \n4. **Remove blue** from between red and yellow; yellow drops to second position. Now: red → yellow.  \n5. Place blue back on top: red → yellow → blue.  \n6. Add green on top: red → yellow → blue → green.",
        "tool_calls": []
      },
      "logprobs": null,
      "finish_reason": "stop",
      "stop_reason": null
    }
  ],
  "usage": {
    "prompt_tokens": 81,
    "total_tokens": 505,
    "completion_tokens": 424,
    "prompt_tokens_details": null
  },
  "prompt_logprobs": null
}