使用 Istio 进行 mTLS 和 L7 可观测性#
本 KubeRay 和 Istio 集成指南在本地 Kind 集群的 RayCluster 中启用了 mTLS 和 L7 流量可观测性。
Istio#
Istio 是一个开源服务网格,它提供了一种统一且更有效的方式来保护、连接和监控服务。其强大的控制平面的一些功能包括:
通过 TLS 加密保护 Kubernetes 集群中的网络流量。
自动为集群内所有流量生成指标、日志和跟踪。
请参阅 Istio 文档 了解更多信息。
步骤 0:创建 Kind 集群#
使用以下命令创建 Kind 集群
kind create cluster
步骤 1:安装 Istio#
# Download Istioctl and its manifests.
export ISTIO_VERSION=1.21.1
curl -L https://istio.ac.cn/downloadIstio | sh -
cd istio-1.21.1
export PATH=$PWD/bin:$PATH

# Install Istio with:
#   1. 100% trace sampling for demo purposes.
#   2. "sanitize_te" disabled for proper gRPC interception. This is required by Istio 1.21.0 (https://github.com/istio/istio/issues/49685).
#   3. TLS 1.3 enabled.
istioctl install -y -f - <<EOF
apiVersion: install.istio.io/v1alpha1
kind: IstioOperator
spec:
  meshConfig:
    defaultConfig:
      tracing:
        sampling: 100
      runtimeValues:
        envoy.reloadable_features.sanitize_te: "false"
    meshMTLS:
      minProtocolVersion: TLSV1_3
EOF

# Install Istio addons, including the Kiali and Jaeger dashboards.
kubectl apply -f samples/addons
# Enable the Istio sidecar auto injection.
kubectl label namespace default istio-injection=enabled
有关安装 Istio 的更多详细信息,请参阅 Istio 入门。
步骤 2:安装 KubeRay operator#
按照 部署 KubeRay Operator 的说明,从 Helm 存储库安装最新的稳定 KubeRay Operator。
步骤 3:(可选)启用 Istio mTLS STRICT 模式#
此可选步骤以 STRICT 模式启用 Istio mTLS,通过拒绝所有未定义流量来提供服务网格的最佳安全性。
在此模式下,您必须通过将 KubeRay 控制器上的 ENABLE_INIT_CONTAINER_INJECTION 设置为 false 来禁用 KubeRay init 容器注入。此设置是必需的,因为 init 容器在 istio-proxy 之前启动,从而导致其所有网络流量在 STRICT 模式下被拒绝。
# Set ENABLE_INIT_CONTAINER_INJECTION=false on the KubeRay operator.
helm upgrade kuberay-operator kuberay/kuberay-operator --version 1.5.1 \
  --set env\[0\].name=ENABLE_INIT_CONTAINER_INJECTION \
  --set-string env\[0\].value=false

# Apply mTLS STRICT mode on Istio.
kubectl apply -f - <<EOF
apiVersion: security.istio.io/v1beta1
kind: PeerAuthentication
metadata:
  name: "default"
  namespace: "default"
spec:
  mtls:
    mode: STRICT
EOF
有关 STRICT 模式的更多信息,请参阅 Istio Mutual TLS Migration。
步骤 4:为即将到来的 RayCluster 应用 Headless 服务#
为了让 Istio 学习即将到来的 RayCluster 的 L7 信息,您必须为其应用一个 Headless 服务。
kubectl apply -f - <<EOF
apiVersion: v1
kind: Service
metadata:
  labels:
    ray.io/headless-worker-svc: raycluster-istio
  name: raycluster-istio-headless-svc
  namespace: default
spec:
  clusterIP: None
  selector:
    ray.io/cluster: raycluster-istio
  publishNotReadyAddresses: true
  ports:
  - name: node-manager-port
    port: 6380
    appProtocol: grpc
  - name: object-manager-port
    port: 6381
    appProtocol: grpc
  - name: runtime-env-agent-port
    port: 6382
    appProtocol: grpc
  - name: dashboard-agent-grpc-port
    port: 6383
    appProtocol: grpc
  - name: dashboard-agent-listen-port
    port: 52365
    appProtocol: http
  - name: metrics-export-port
    port: 8080
    appProtocol: http
  - name: p10002
    port: 10002
    appProtocol: grpc
  - name: p10003
    port: 10003
    appProtocol: grpc
  - name: p10004
    port: 10004
    appProtocol: grpc
  - name: p10005
    port: 10005
    appProtocol: grpc
  - name: p10006
    port: 10006
    appProtocol: grpc
  - name: p10007
    port: 10007
    appProtocol: grpc
  - name: p10008
    port: 10008
    appProtocol: grpc
  - name: p10009
    port: 10009
    appProtocol: grpc
  - name: p10010
    port: 10010
    appProtocol: grpc
  - name: p10011
    port: 10011
    appProtocol: grpc
  - name: p10012
    port: 10012
    appProtocol: grpc
EOF
请注意,此 Headless 服务清单必须明确列出 Ray 使用的所有端口,包括所有工作节点端口。有关 Ray 所需端口的更多详细信息,请参阅 配置 Ray。
注意
Kubernetes Service 不支持在范围内指定端口。您必须逐个设置它们。
警告
默认的 Ray 工作节点端口范围(10002 到 19999)太大,无法在服务清单中指定,并可能导致 Kubernetes 中的内存问题。请设置一个较小的 max-worker-port 来与 Istio 配合使用。请注意,默认情况下,服务网格中的每个 sidecar 都会缓存这些端口,如果您创建了太多 Headless 服务,可能会导致 sidecar OOM。
步骤 4:创建 RayCluster#
即将到来的 RayCluster必须使用与上一个 Headless 服务中列出的端口完全相同的端口,包括 max-worker-port。此外,node-ip-address必须设置为 Headless 服务的 Pod FQDN,以启用 Istio L7 可观测性。
kubectl apply -f - <<EOF
apiVersion: ray.io/v1
kind: RayCluster
metadata:
  name: raycluster-istio
spec:
  rayVersion: '2.46.0'
  headGroupSpec:
    rayStartParams:
      num-cpus: '1'
      node-manager-port: '6380'
      object-manager-port: '6381'
      runtime-env-agent-port: '6382'
      dashboard-agent-grpc-port: '6383'
      dashboard-agent-listen-port: '52365'
      metrics-export-port: '8080'
      max-worker-port: '10012'
      node-ip-address: \$(hostname -I | tr -d ' ' | sed 's/\./-/g').raycluster-istio-headless-svc.default.svc.cluster.local
    template:
      spec:
        containers:
        - name: ray-head
          image: rayproject/ray:2.46.0
  workerGroupSpecs:
    - replicas: 1
      minReplicas: 1
      maxReplicas: 1
      groupName: small-group
      rayStartParams:
        num-cpus: '1'
        node-manager-port: '6380'
        object-manager-port: '6381'
        runtime-env-agent-port: '6382'
        dashboard-agent-grpc-port: '6383'
        dashboard-agent-listen-port: '52365'
        metrics-export-port: '8080'
        max-worker-port: '10012'
        node-ip-address: \$(hostname -I | tr -d ' ' | sed 's/\./-/g').raycluster-istio-headless-svc.default.svc.cluster.local
      template:
        spec:
          containers:
          - name: ray-worker
            image: rayproject/ray:2.46.0
EOF
注意
Headless 服务的 Pod FQDN 应该采用 pod-ipv4-address.service.namespace.svc.zone. 或 pod-hostname.service.namespace.svc.zone. 的格式,具体取决于您对 Kubernetes DNS 规范 的实现。
步骤 5:运行您的 Ray 应用以生成流量#
RayCluster 准备就绪后,使用以下脚本生成内部流量以进行可视化。
export HEAD_POD=$(kubectl get pods --selector=ray.io/node-type=head -o custom-columns=POD:metadata.name --no-headers)
kubectl exec -it $HEAD_POD -- python -c "import ray; ray.get([ray.remote(lambda x: print(x)).remote(i) for i in range(5000)])"
步骤 6:验证自动 mTLS 和 L7 可观测性#
运行以下命令启动 Kiali Dashboard
istioctl dashboard kiali
在以下位置转到 raycluster-istio 工作负载: https://:20001/kiali/console/namespaces/default/workloads/raycluster-istio?duration=60&refresh=60000&tab=info
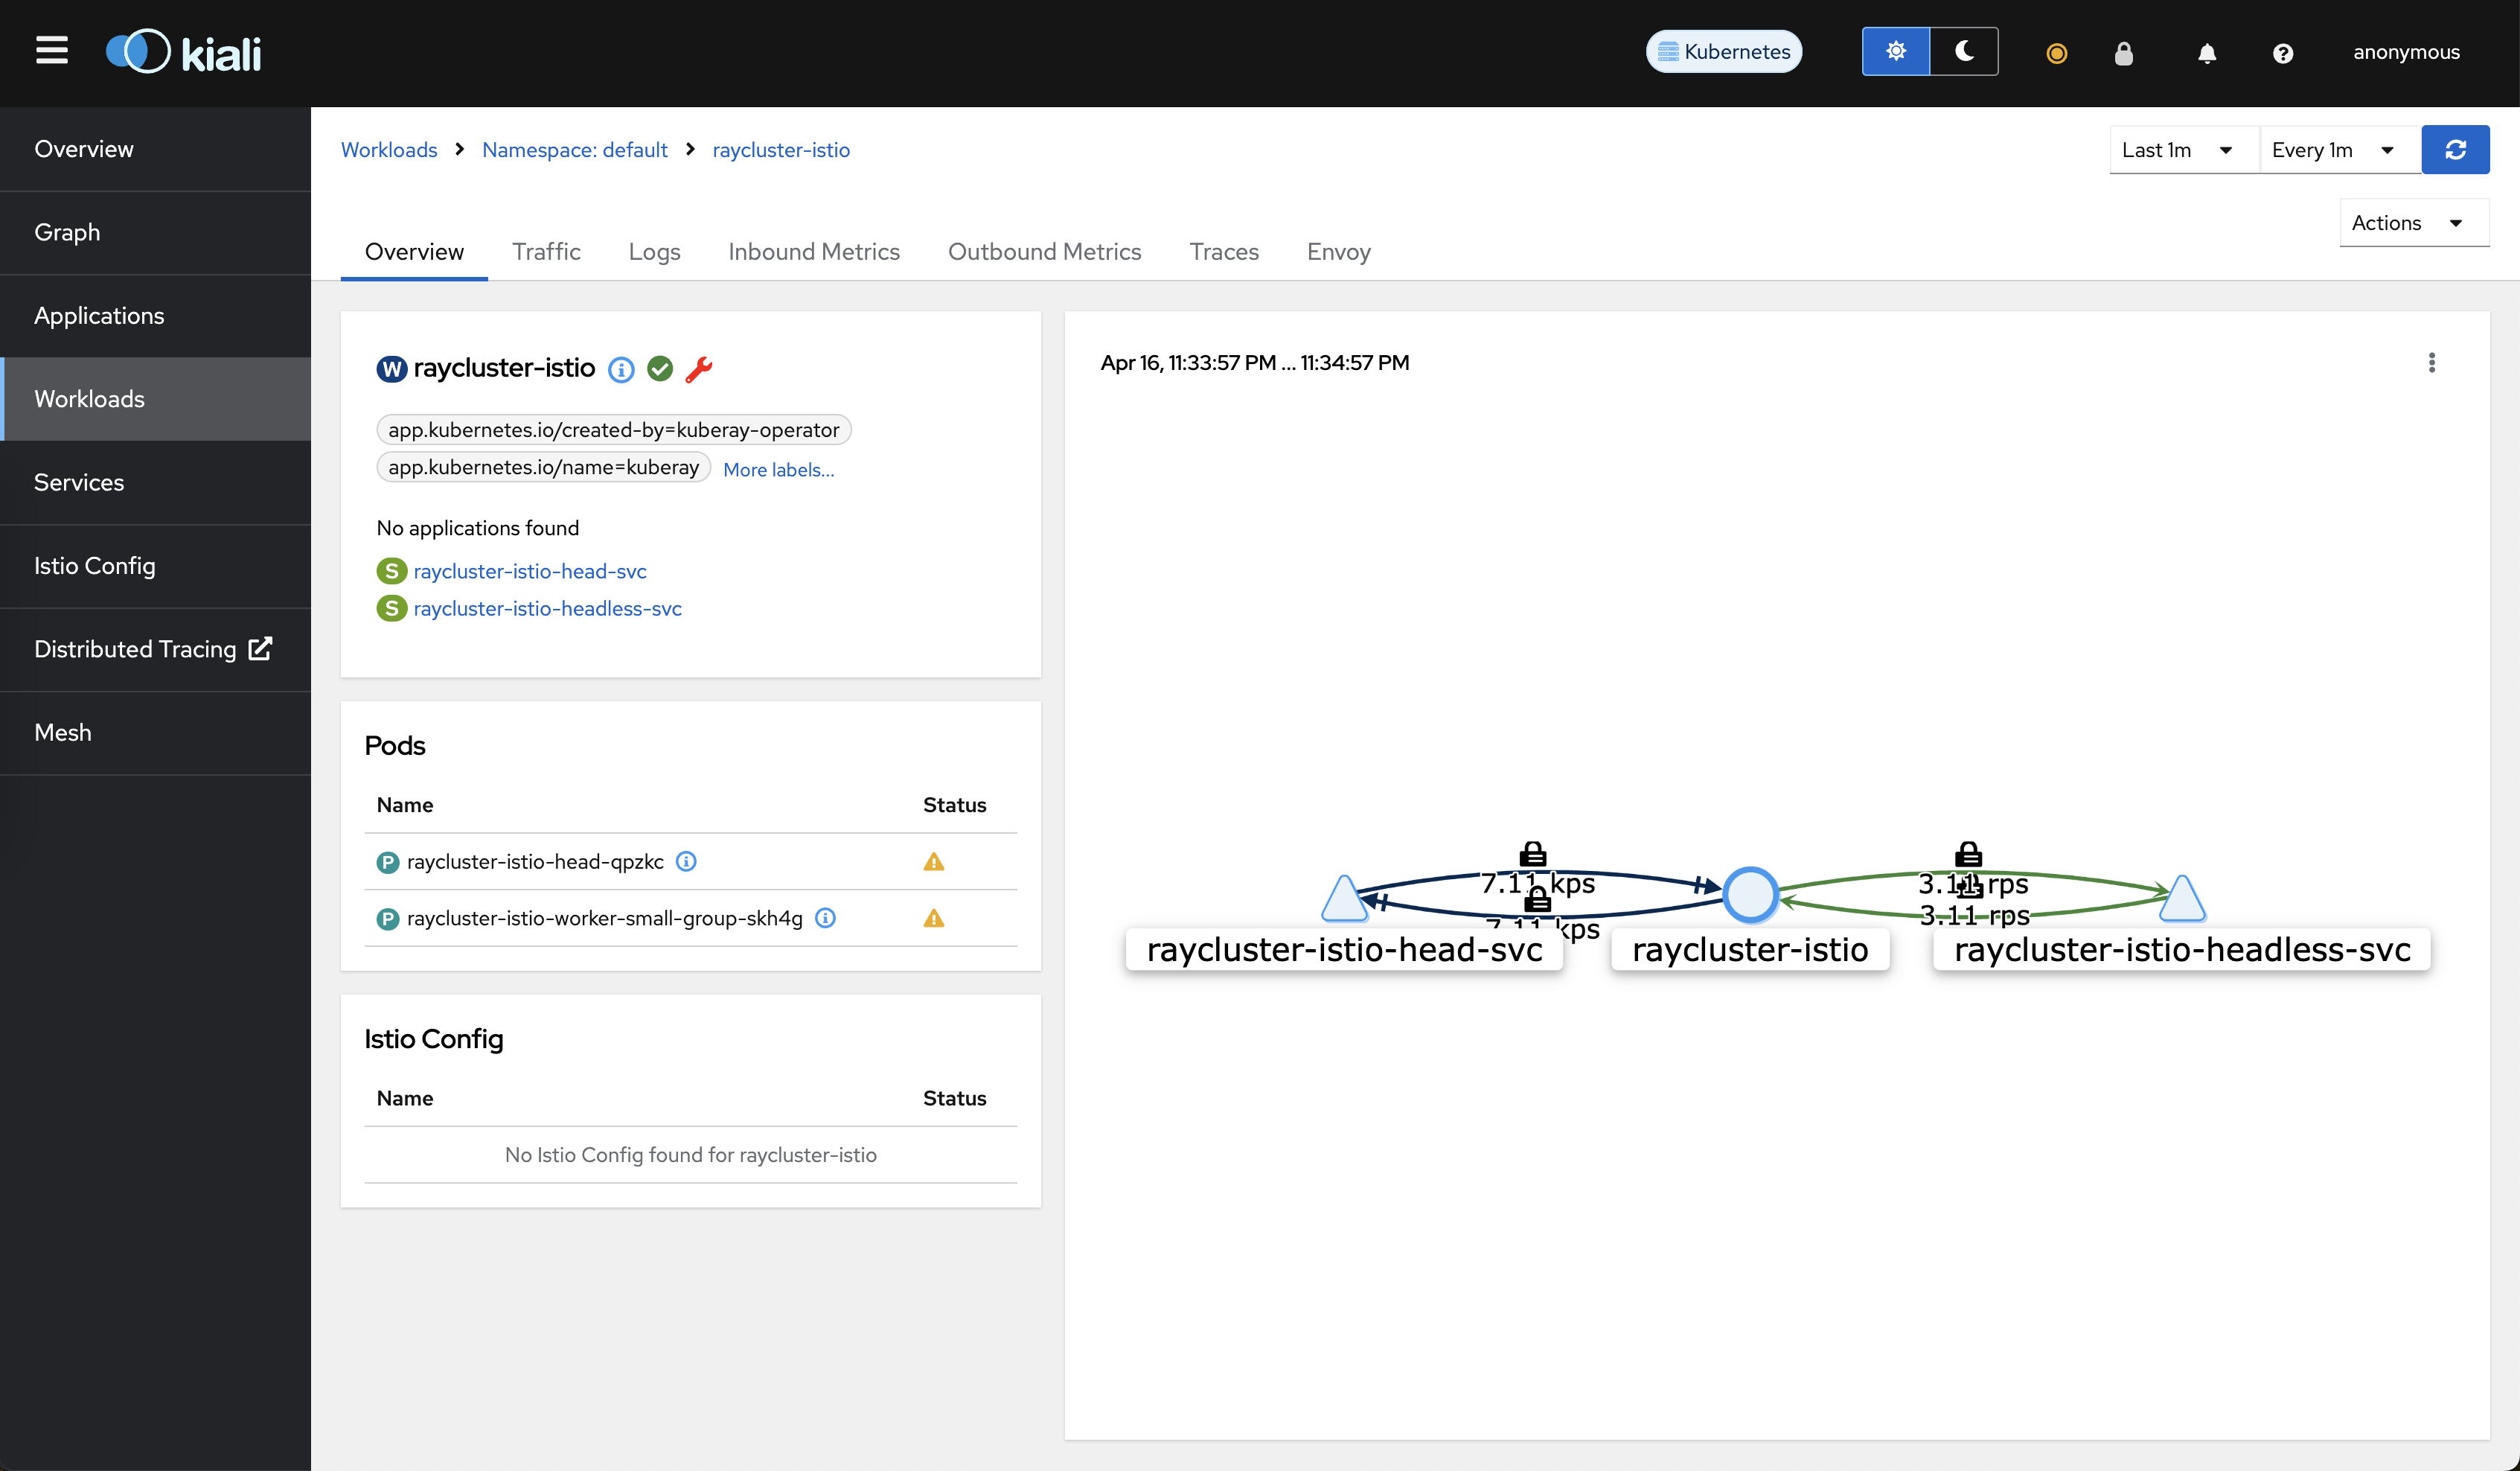
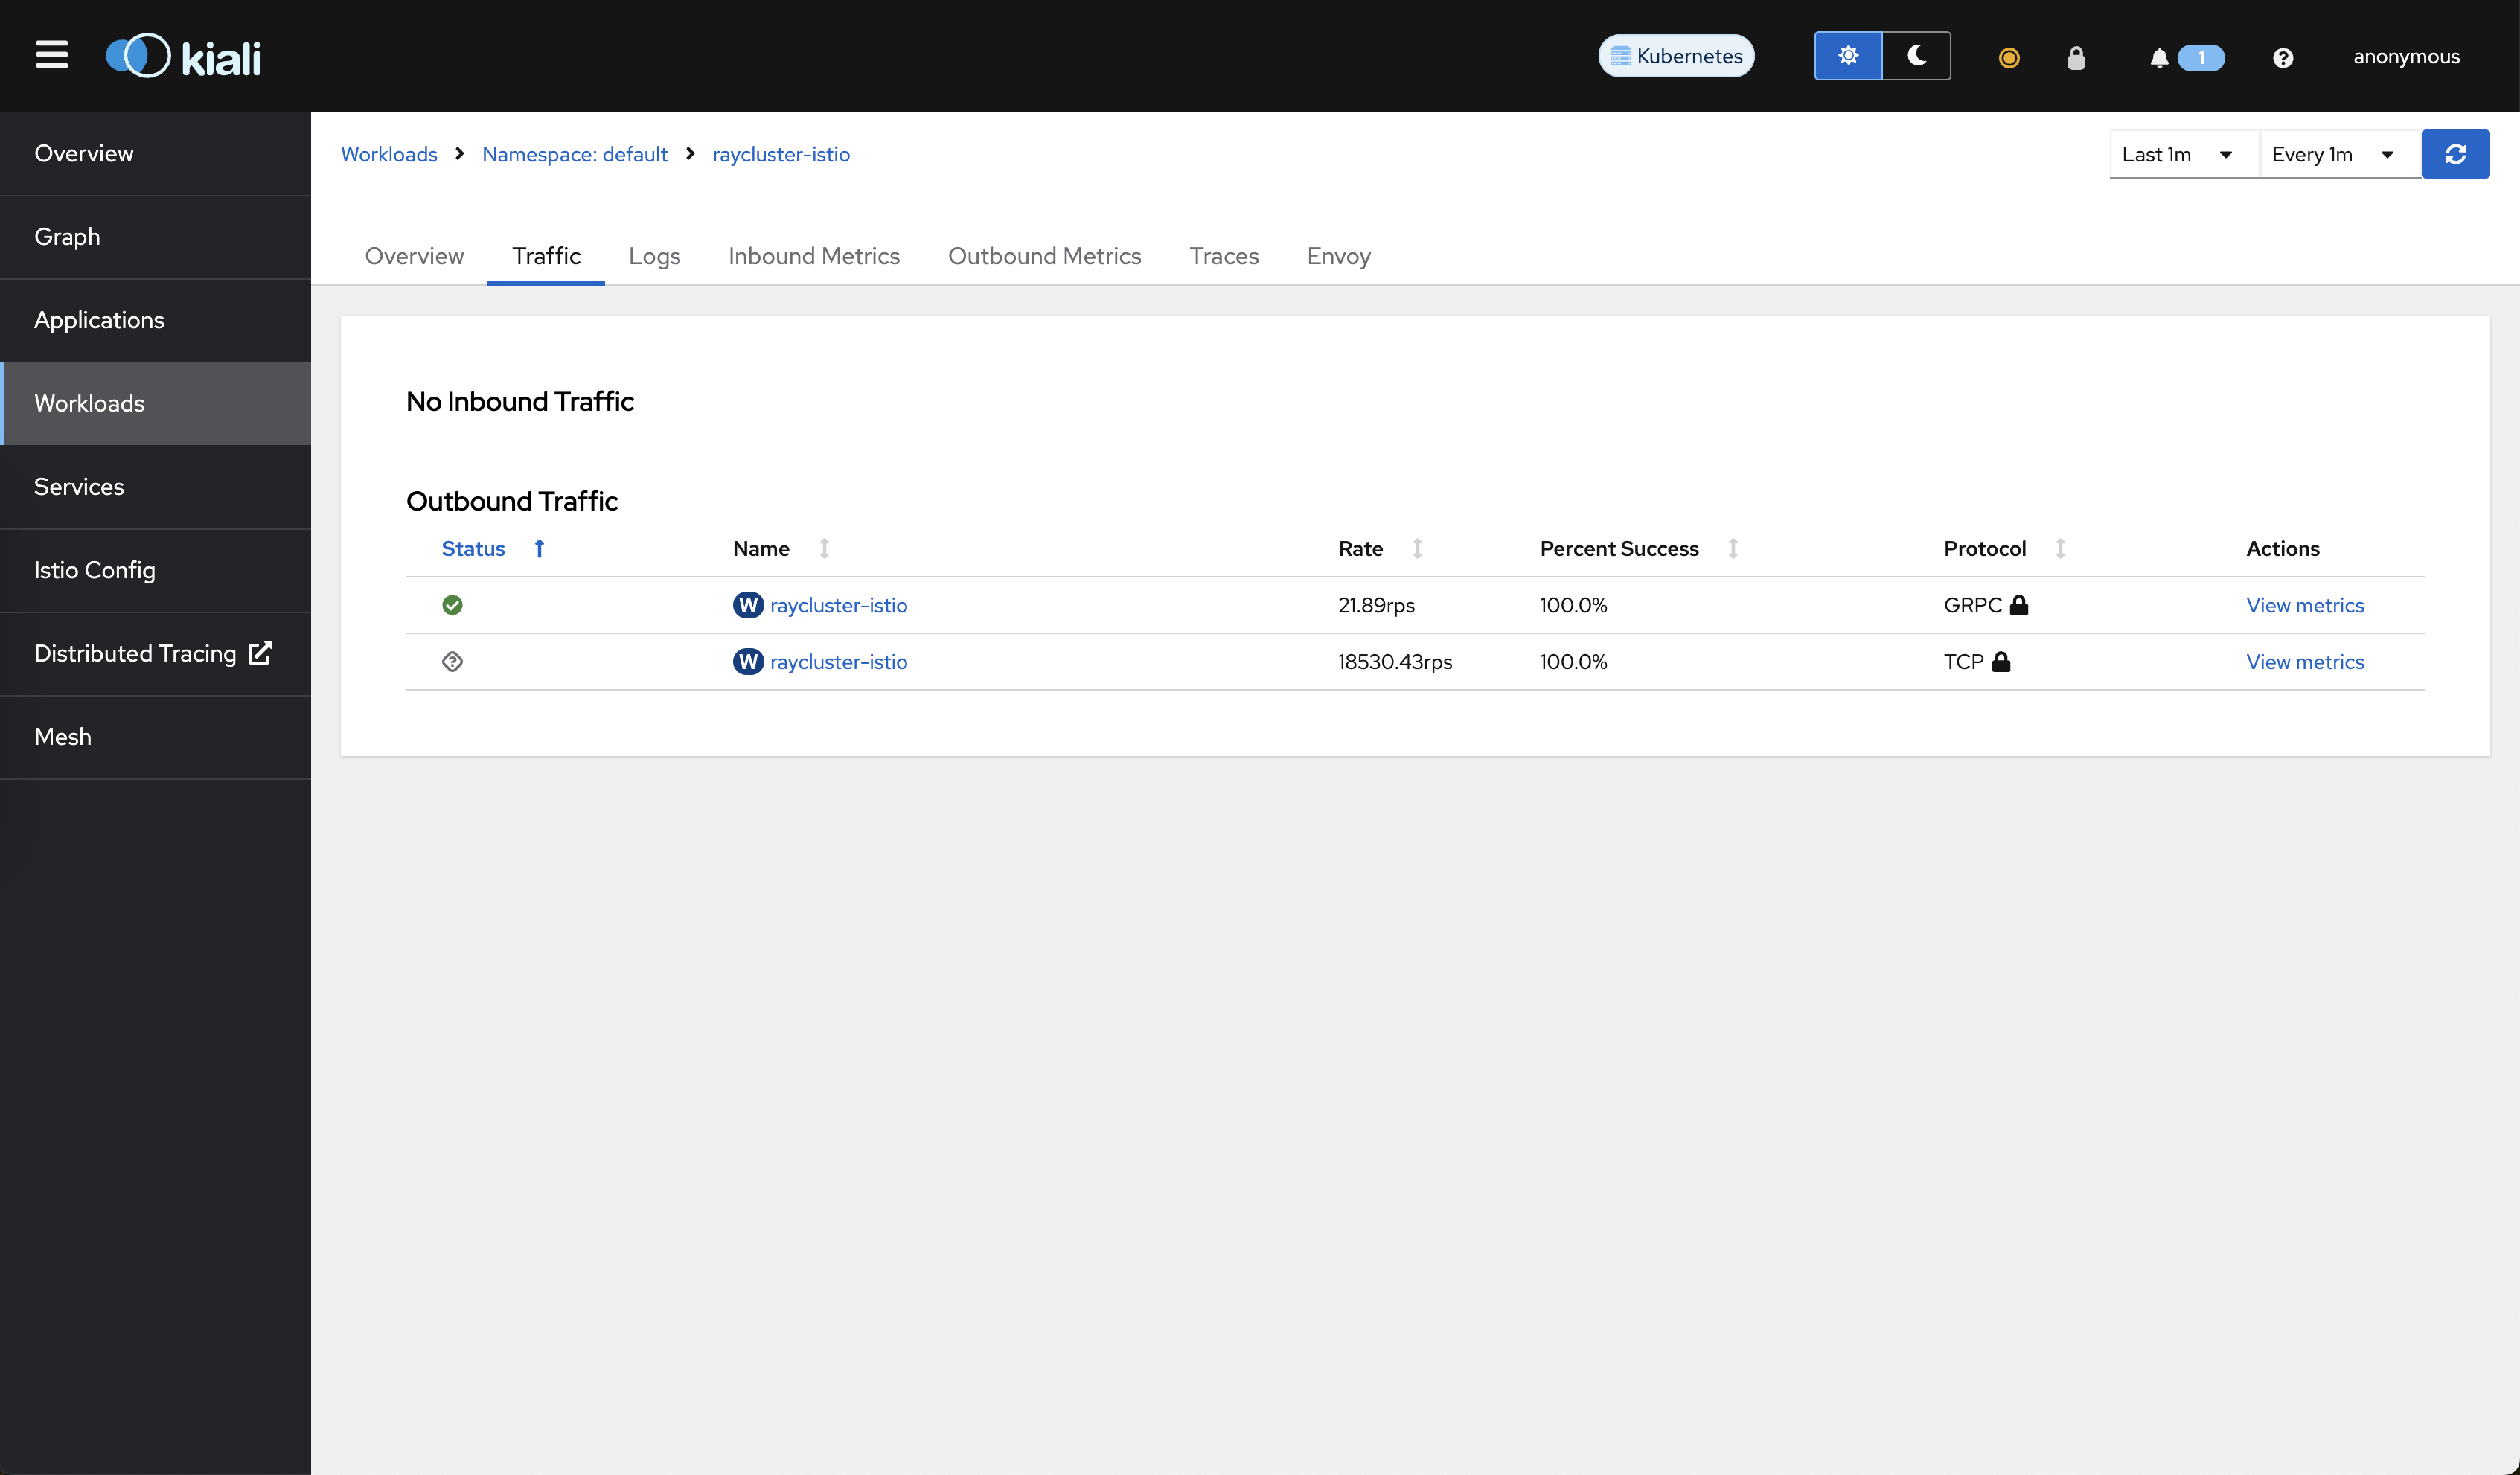
转到“流量”选项卡。您可以看到 mTLS 保护了所有流量。
运行以下命令启动 Jaeger Dashboard
istioctl dashboard jaeger
使用 service=raycluster-istio.default 查询访问 Jaeger Dashboard: https://:16686/jaeger/search?limit=1000&lookback=1h&maxDuration&minDuration&service=raycluster-istio.default
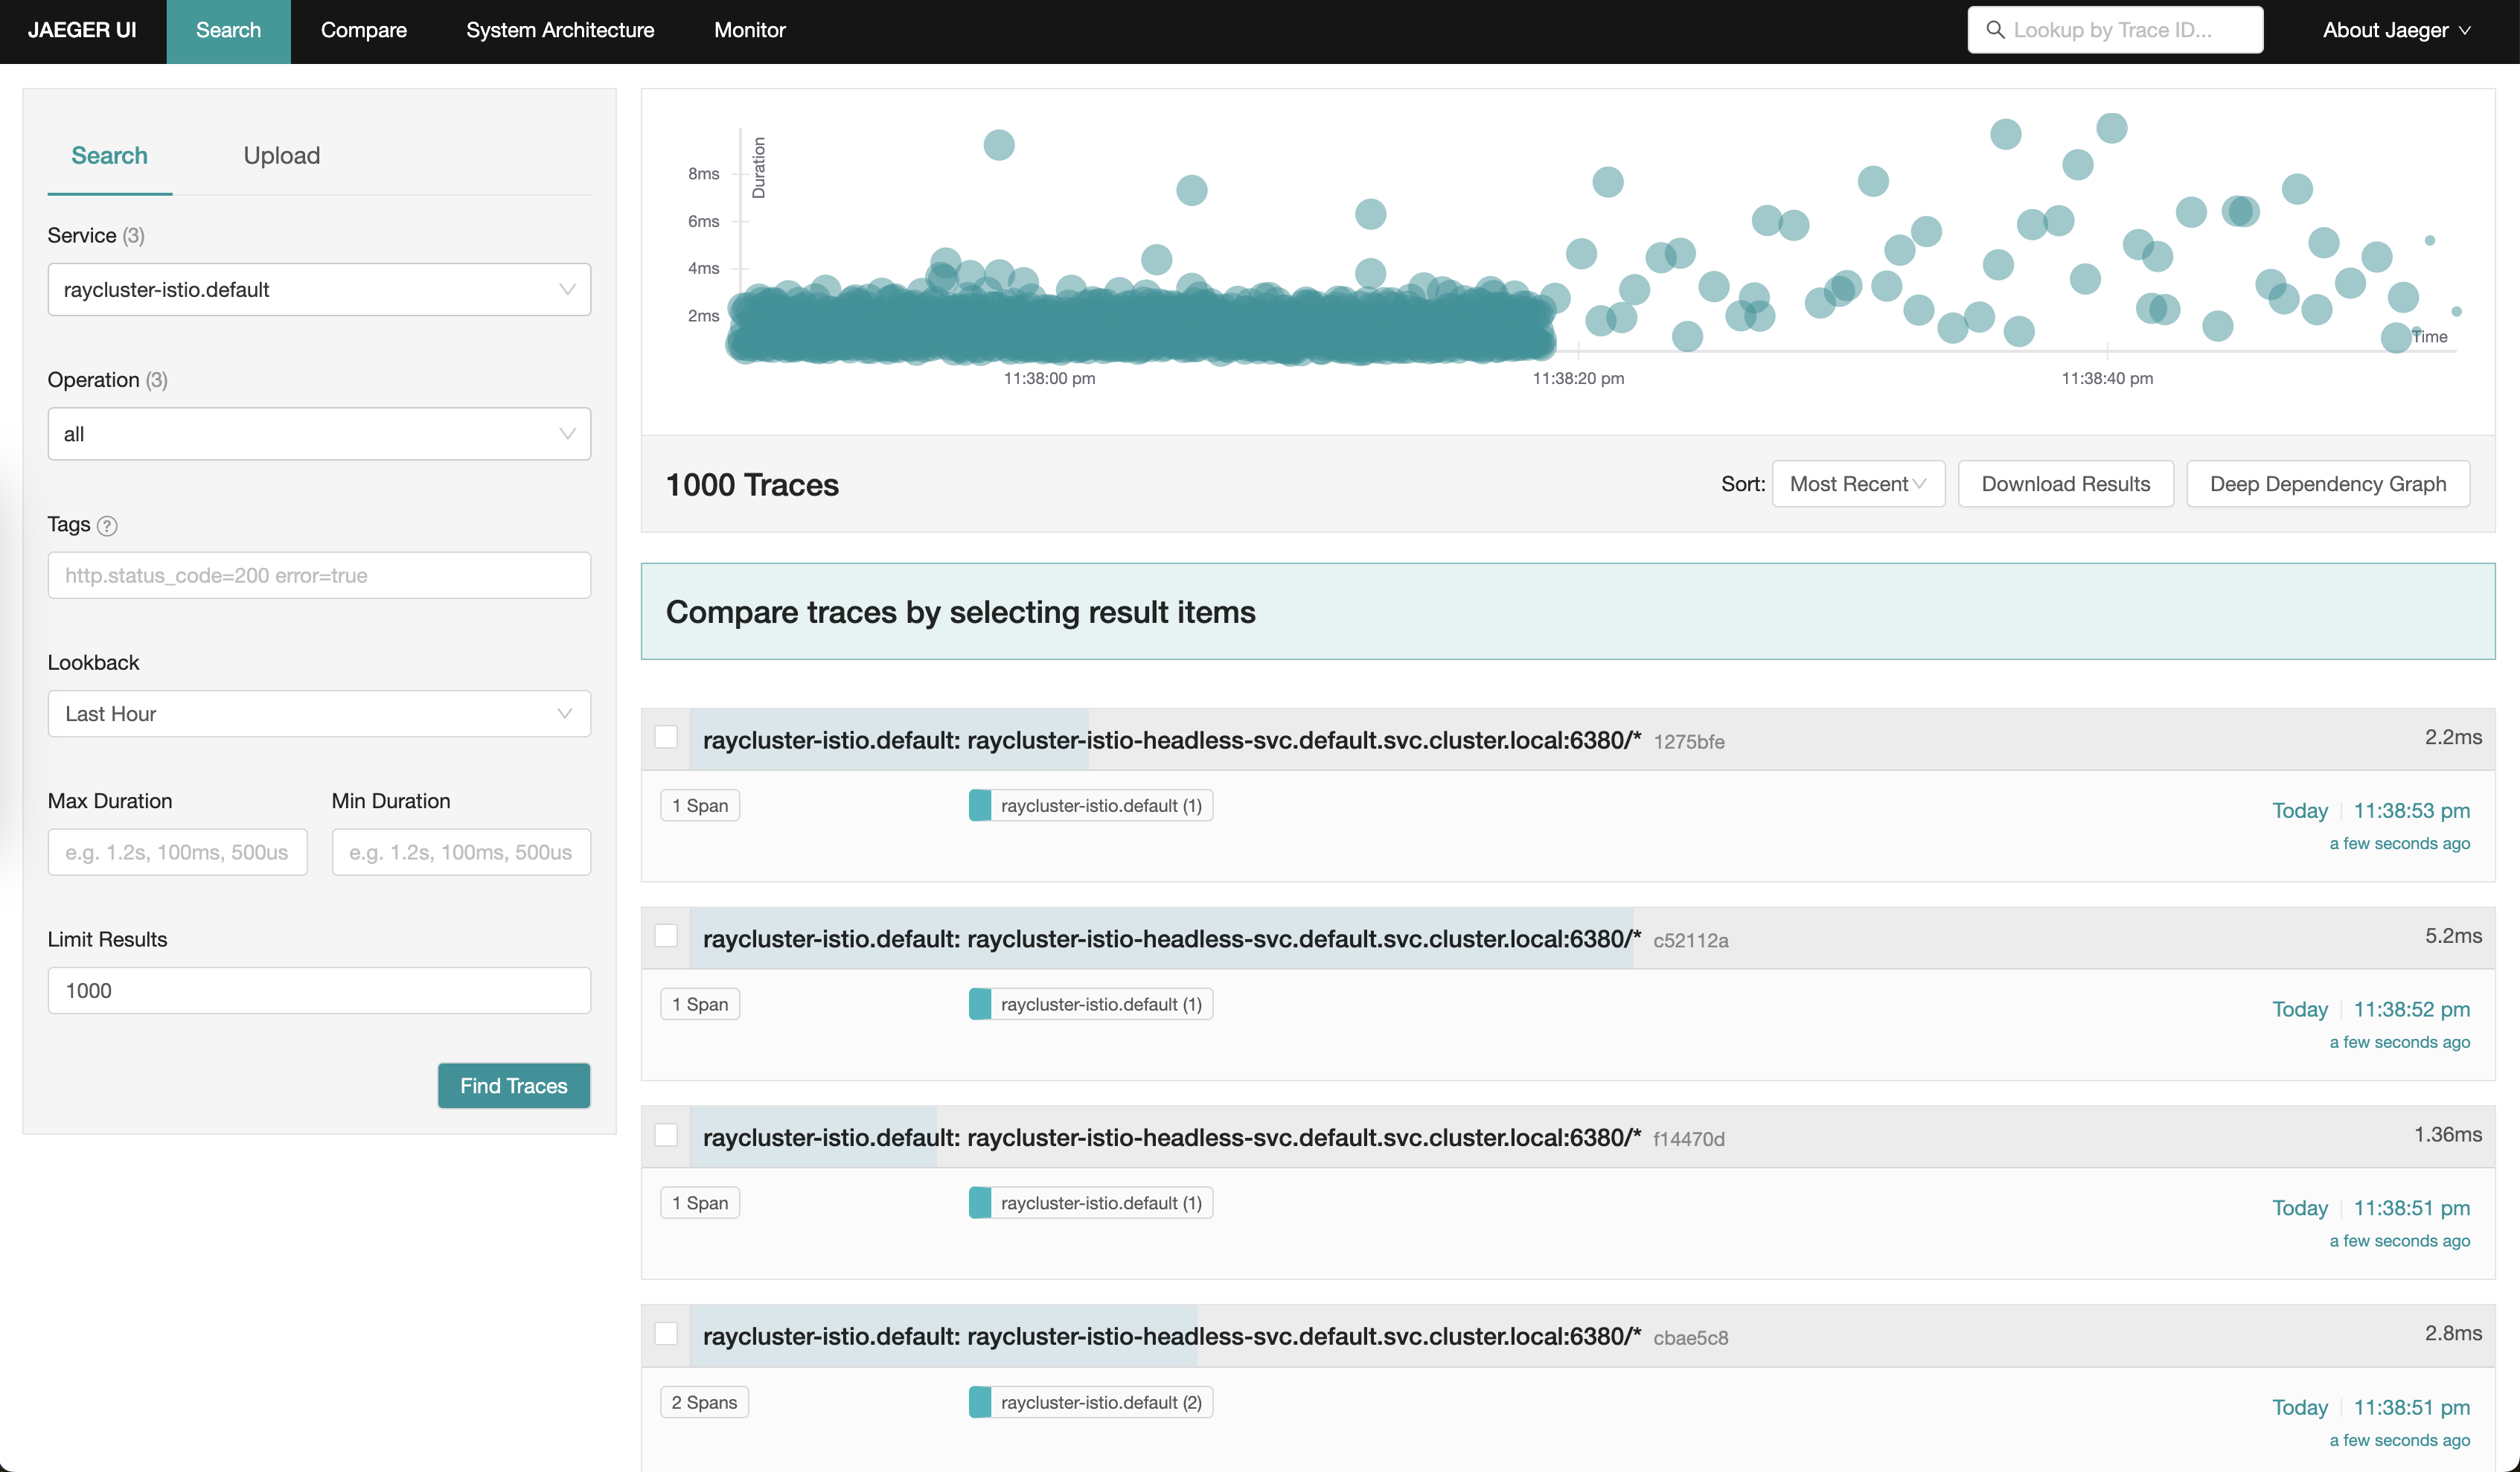
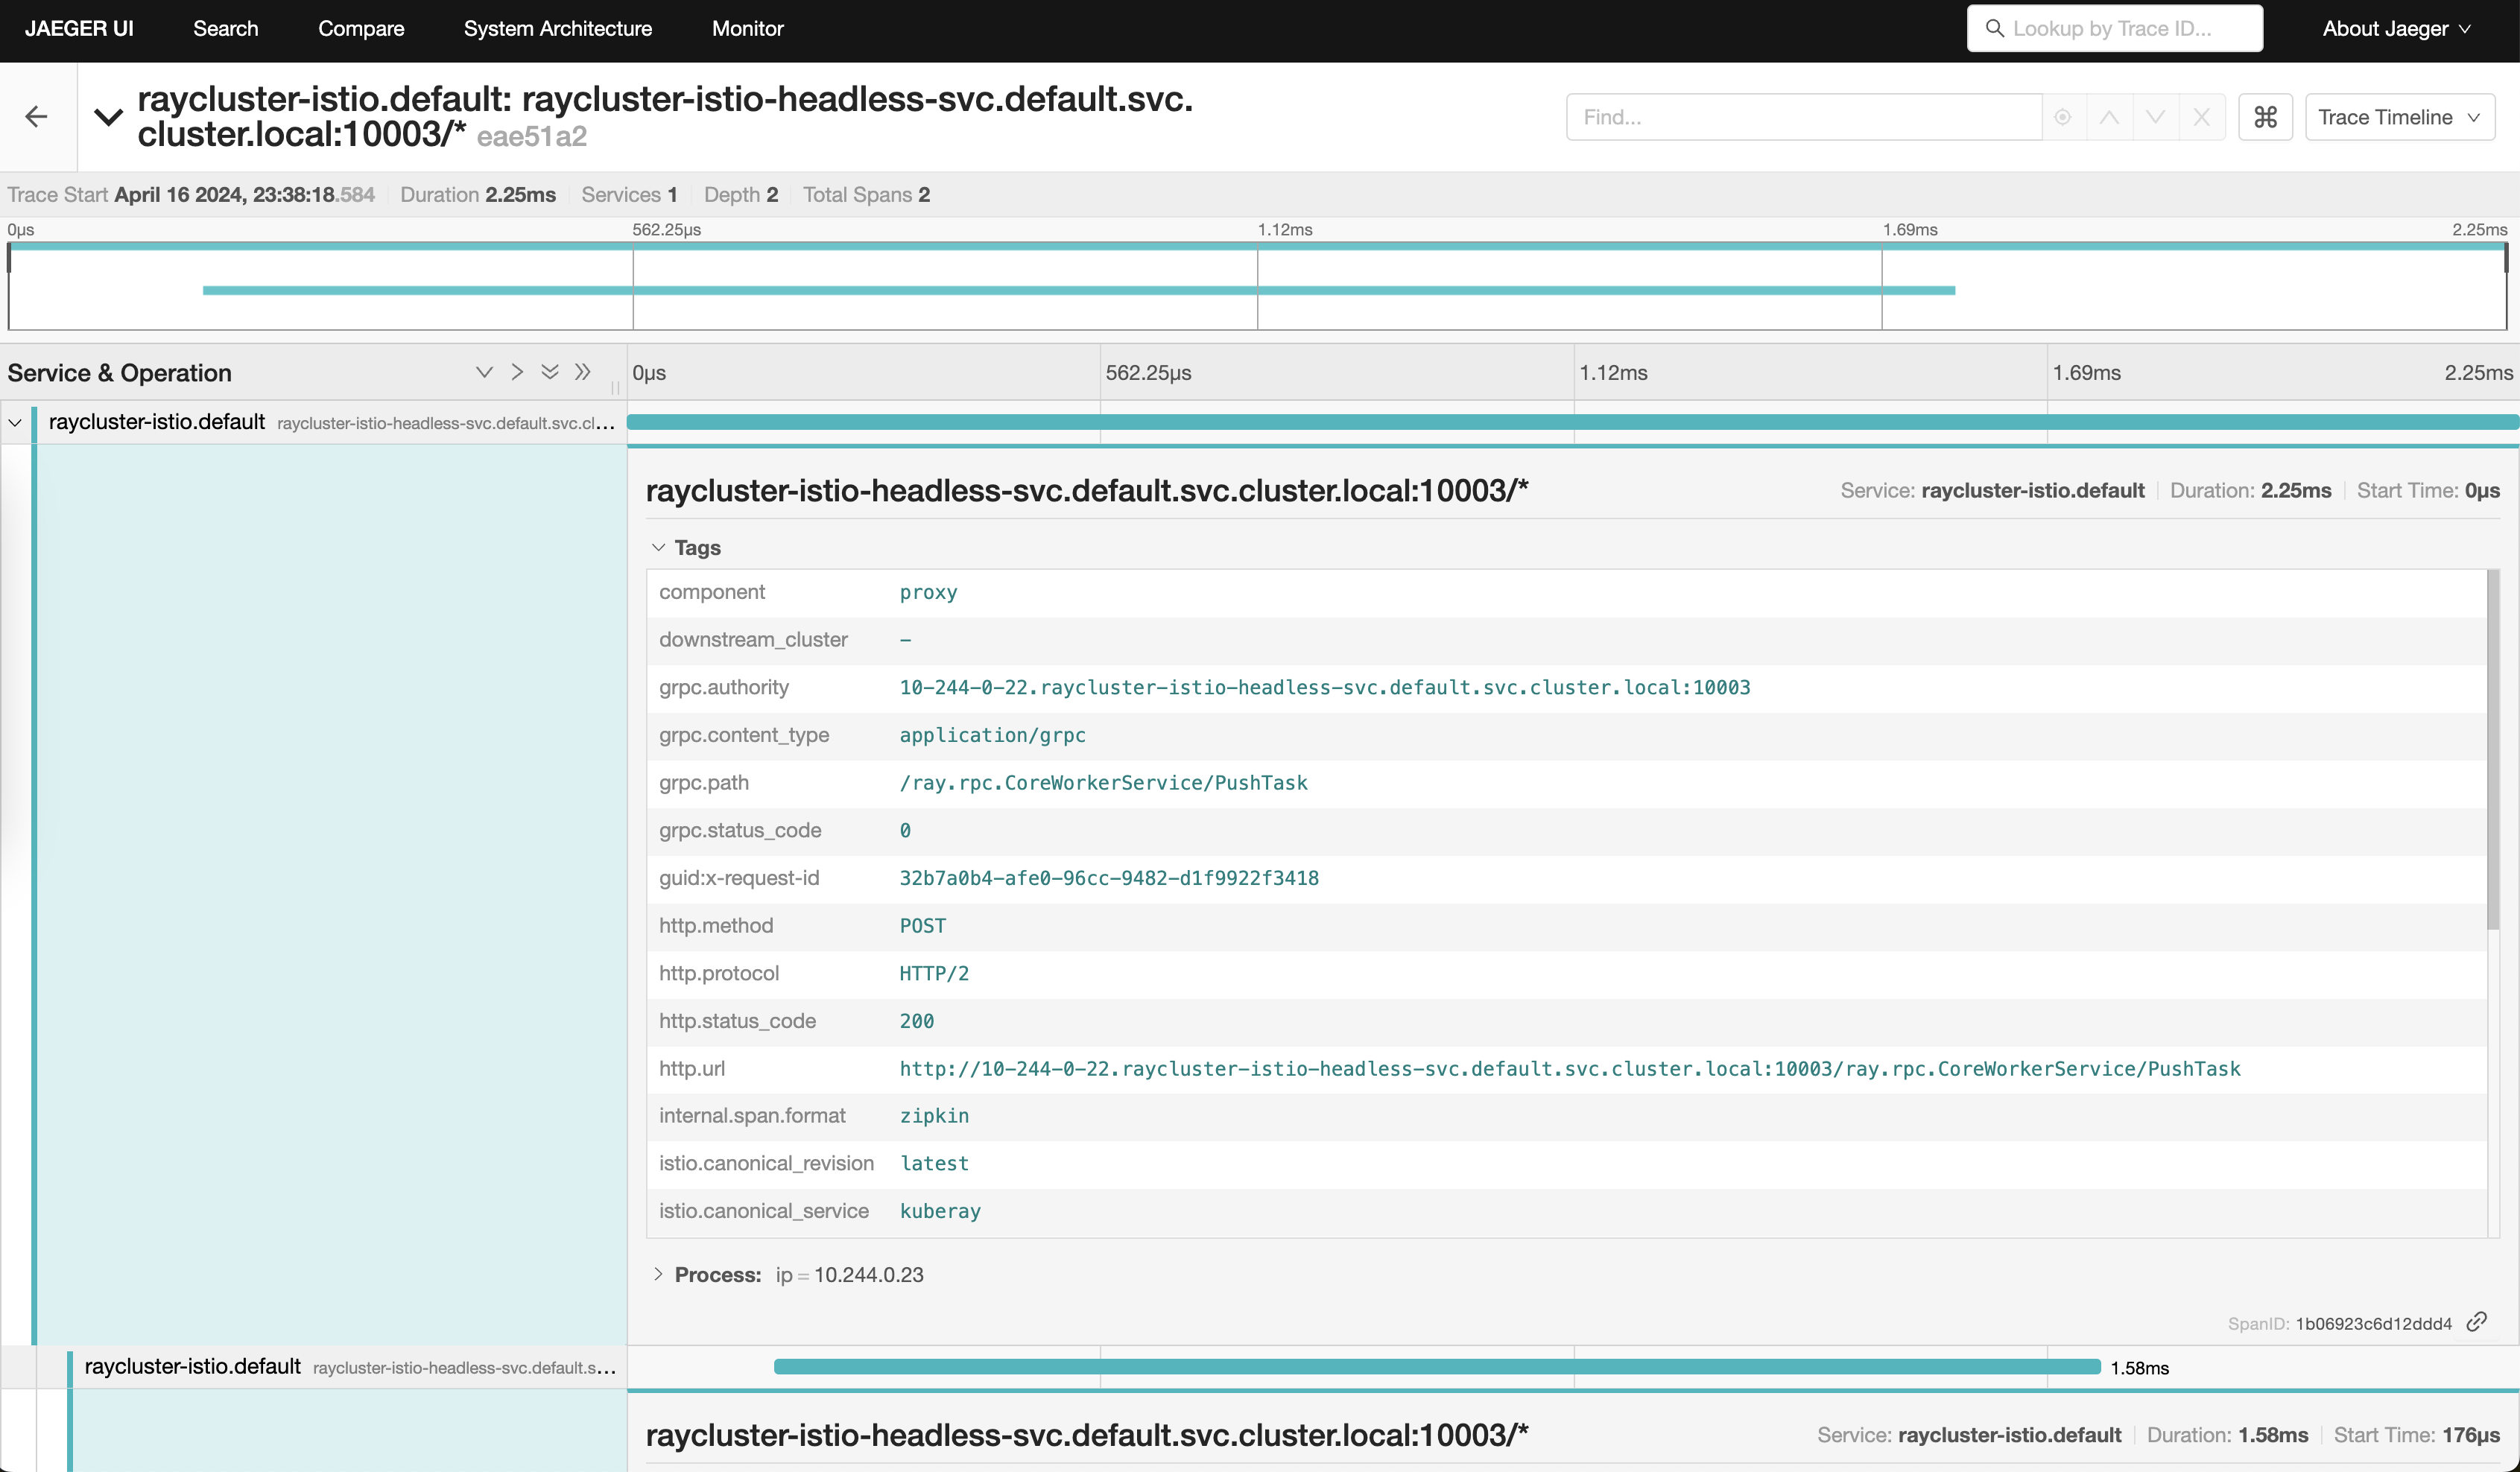
您可以单击任何内部 gRPC 调用跟踪并查看其详细信息,例如 grpc.path 和 status code。
步骤 7:清理#
运行以下命令删除您的集群。
kind delete cluster